No Bake Peanut Butter Oat Cups
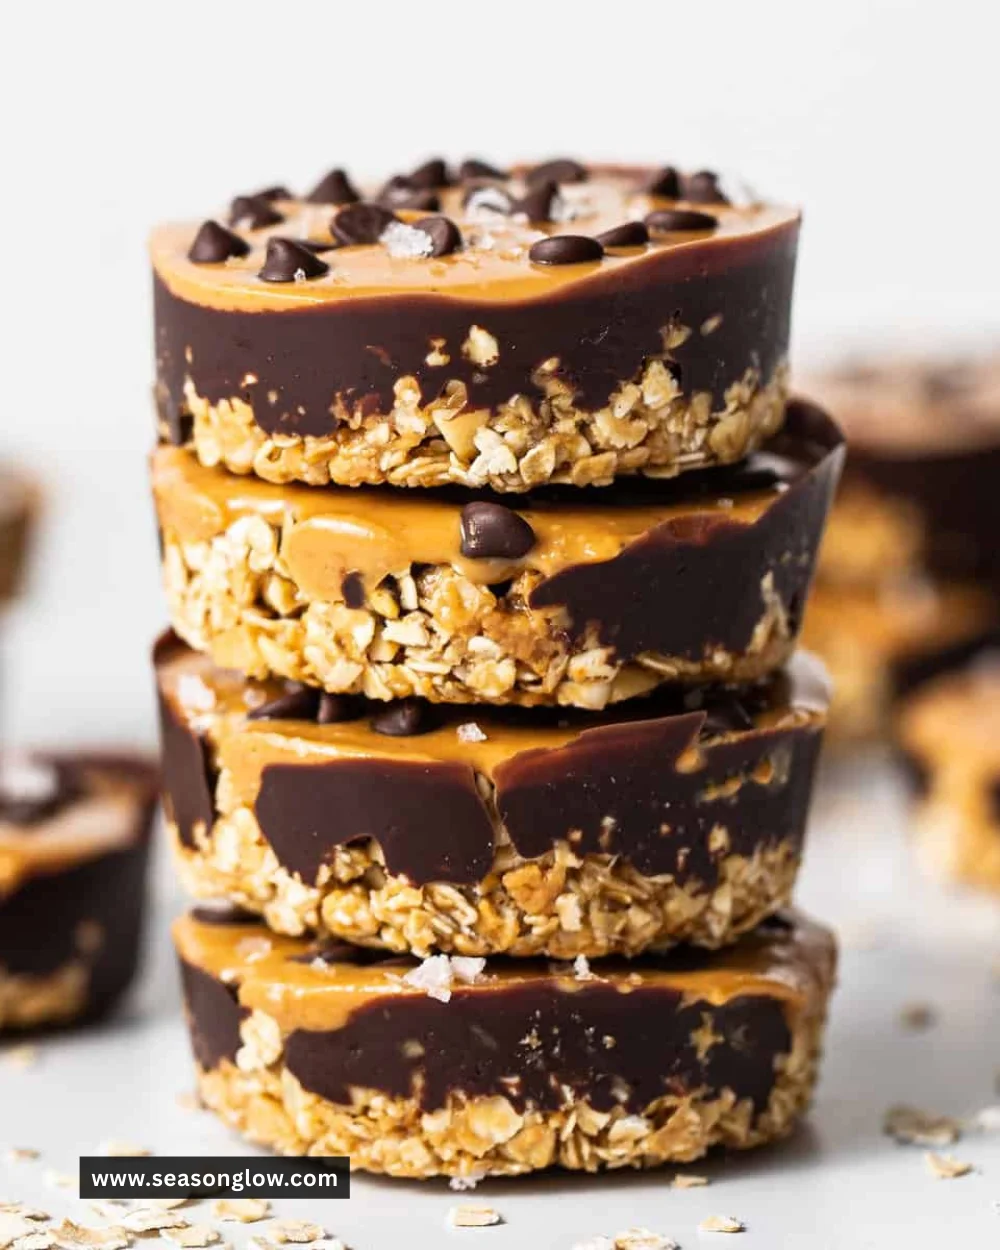
There’s something magical about the combination of peanut butter and oats that brings me straight back to my childhood. Growing up, these two ingredients were staples in my home, often transformed into delicious snacks that satisfied my sweet tooth without the guilt. My mom’s creative use of pantry staples inspired me to whip up tasty treats that are easy to make and even easier to enjoy. One of those delightful concoctions is this No Bake Peanut Butter Oat Cups recipe, which is not only nostalgic but also perfect for those busy days when cravings strike and you need a little something sweet without all the fuss.
Recipe Timing
- Prep Duration: 10 minutes
- Active Cooking: 10 minutes
- Total Duration: 40 minutes (includes chilling time)
- Portion Size: Makes about 12 cups
- Complexity: Simple
Nutritional Recipe
- Calories per portion: Approximately 120 calories
- Protein: 4 grams
- Carbs: 14 grams
- Fats: 6 grams
- Fiber: 2 grams
- Sugars: 5 grams
- Sodium: 50 mg
Why You’ll Love This No Bake Peanut Butter Oat Cups
These little peanut butter oat cups are a dream come true—they require absolutely no baking, which means you can satisfy your sweet cravings in no time! They are also incredibly versatile; switch up sweeteners or add in your favorite nuts or dried fruits to personalize your treat. Plus, they’re wholesome enough to give you an energy boost, making them perfect for a snack on the go or a post-workout treat. Oh, and let’s not forget about the indulgent chocolate chips that bring a delightful surprise to each bite!
The Complete Cooking Journey
Let’s embark on this simple yet rewarding culinary adventure together! With just a handful of ingredients and minimal effort, you’ll create a treat that’s perfect for sharing (or not sharing, I won’t judge). From mixing the ingredients to slicing up the chilled delights, this recipe takes you through each step with joy and ease.
Ingredients:
- 1 cup oats
- 1/2 cup peanut butter
- 1/4 cup honey or maple syrup
- 1/2 teaspoon vanilla extract
- 1/4 cup chocolate chips (optional)
- Pinch of salt
Method:
### Step 1: Combine the Base Ingredients
In a mixing bowl, combine the oats, peanut butter, honey (or maple syrup), vanilla extract, and a pinch of salt. Using a spatula or spoon, mix until everything comes together in a delicious, sticky mixture.
### Step 2: Fold in the Chocolate Chips
If you’re feeling a little indulgent (and let’s be honest, who isn’t?), fold in the chocolate chips until evenly distributed throughout the mixture.
### Step 3: Press into a Lined Tin
Line a muffin tin or a small baking dish with parchment paper and press the mixture firmly into the bottom. Use the back of a spoon or your fingers to ensure it’s compact and evenly spread.
### Step 4: Chill to Set
Pop the tin or dish in the refrigerator for at least 30 minutes to allow the oat cups to set. Patience is a virtue here, but once you taste them, you’ll know it was worth it!
### Step 5: Cut and Serve
Once set, remove the cups from the fridge, and carefully cut them into squares or cups. Enjoy them immediately or store them for later!
Serving Suggestions & Pairings
These No Bake Peanut Butter Oat Cups are quite the versatile snack. Enjoy them as a breakfast on-the-go, in your lunchbox, or as a mid-afternoon energy boost. Pair them with a side of fresh fruit or yogurt for a balanced treat that delights both the eyes and the taste buds.
Storage & Leftovers Guide
Store any leftover oat cups in an airtight container in the fridge for up to one week. For a freezer-safe option, wrap the individual cups in plastic wrap and store them in a freezer bag for up to three months. When you’re ready to enjoy, just let them sit at room temperature for a few minutes before digging in!
Kitchen Wisdom & Success Tips
- Use natural peanut butter for a creamier texture that’s still healthy.
- Want it vegan? Maple syrup is a perfect alternative to honey.
- Feel free to experiment with other mix-ins like nuts, seeds, or dried fruit.
- Make it a fun family activity by involving the kids in the mixing and pressing!
Flavor Variations & Adaptations
- Choco-Nut Delight: Add 1/4 cup chopped nuts for an extra crunch.
- Fruit Fusion: Incorporate dried cranberries or raisins for a fruity twist.
- Coconut Craze: Mix in shredded coconut for a tropical vibe.
Reader Questions & Solutions
-
Can I use quick oats instead of rolled oats?
Yes, quick oats work well, but the texture will be slightly different. Rolled oats give a chewier bite. -
What can I use instead of peanut butter?
Try almond butter, cashew butter, or sun butter if you have nut allergies. -
How do I make these gluten-free?
Ensure you use certified gluten-free oats! -
Can I reduce the sweetness?
Absolutely! Adjust the honey/maple syrup to your taste preference or use mashed ripe bananas for sweetness. -
What can I do if my mixture is too dry?
Add a splash of nut milk or an extra spoonful of peanut butter until you reach the desired consistency.
Wrapping Up
So there you have it, a fun, simple, and satisfying treat that’ll have you wondering how you ever lived without these No Bake Peanut Butter Oat Cups in your life! Perfect for a quick snack or even dessert, they are bound to become one of your go-to recipes. Remember, food is not only about nourishment; it’s about connection, happiness, and memories. Grab your ingredients and create your very own delicious story! Happy cooking!
Print
No Bake Peanut Butter Oat Cups
- Total Time: 40 minutes
- Yield: 12 cups 1x
- Diet: Vegetarian
Description
A nostalgic and easy-to-make treat combining peanut butter and oats, perfect for satisfying sweet cravings without baking.
Ingredients
- 1 cup oats
- 1/2 cup peanut butter
- 1/4 cup honey or maple syrup
- 1/2 teaspoon vanilla extract
- 1/4 cup chocolate chips (optional)
- Pinch of salt
Instructions
- In a mixing bowl, combine the oats, peanut butter, honey (or maple syrup), vanilla extract, and a pinch of salt. Mix until combined.
- Fold in the chocolate chips until evenly distributed.
- Line a muffin tin or small baking dish with parchment paper and press the mixture firmly into the bottom.
- Refrigerate for at least 30 minutes to allow the mixture to set.
- Once set, remove from the fridge and cut into squares or cups. Enjoy!
Notes
Store leftovers in an airtight container in the fridge for up to one week. For longer storage, wrap individually and freeze for up to three months.
- Prep Time: 10 minutes
- Cook Time: 10 minutes
- Category: Snack
- Method: No-Bake
- Cuisine: American
Nutrition
- Serving Size: 1 cup
- Calories: 120
- Sugar: 5g
- Sodium: 50mg
- Fat: 6g
- Saturated Fat: 1g
- Unsaturated Fat: 5g
- Trans Fat: 0g
- Carbohydrates: 14g
- Fiber: 2g
- Protein: 4g
- Cholesterol: 0mg