No Bake Oreo Cheesecake Recipe
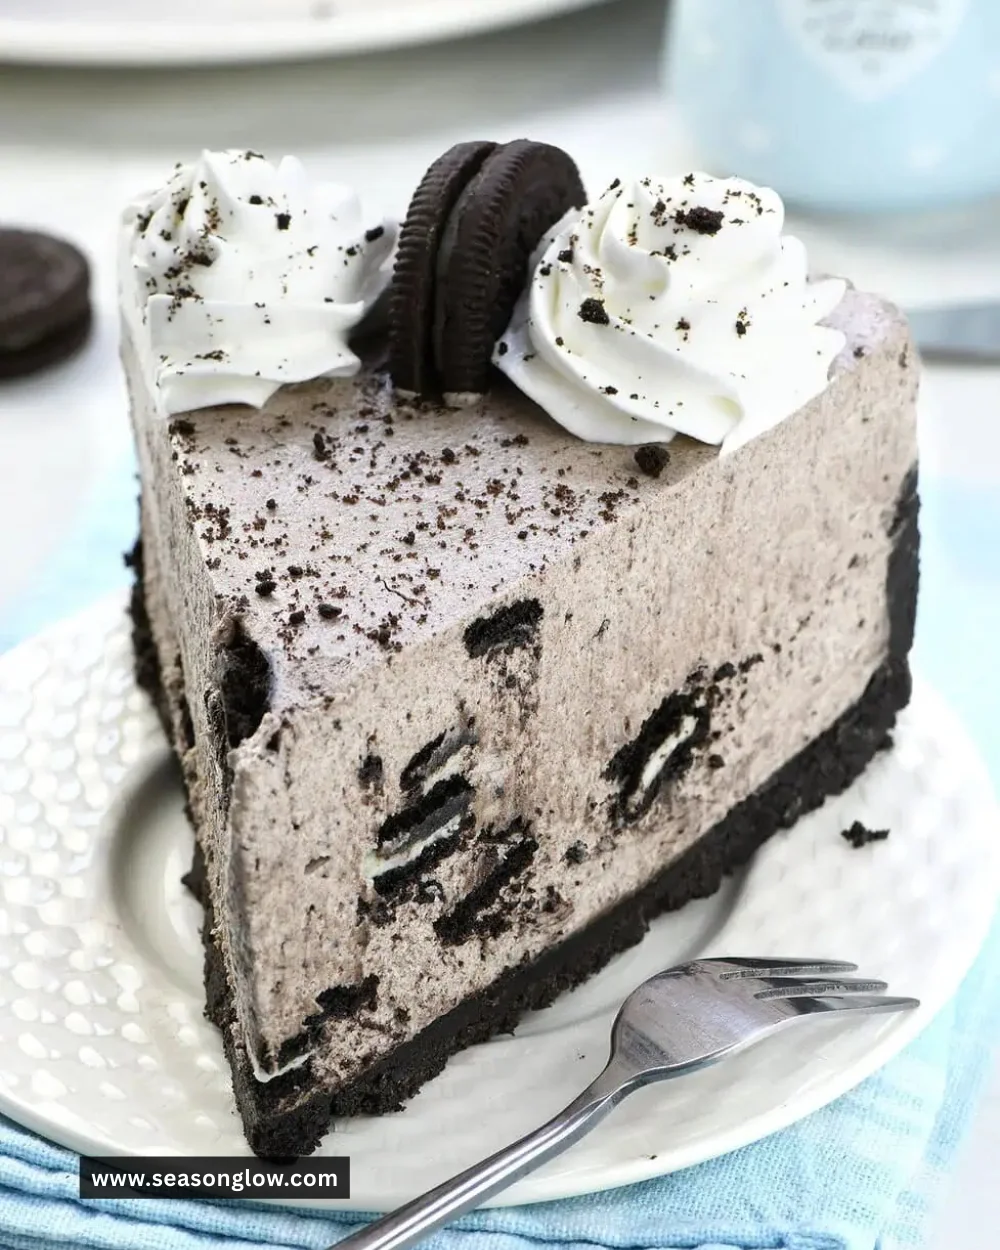
There’s something truly magical about desserts that require zero baking. As the sun sets, casting a warm glow through the kitchen window, I often find myself drawn to the idea of creating something sweet without the need for an oven. That’s how I stumbled upon the No Bake Oreo Cheesecake—a dessert that not only satiates my sweet tooth but also celebrates the nostalgic crunch of everyone’s favorite cookie: the Oreo.
I can still remember the first time I had an Oreo cheesecake. I was at a family gathering, and my aunt had outdone herself with this luscious treat that practically melted in my mouth. The rich cream cheese combined with the chocolatey crust took my love for Oreos to a whole new level. Since then, it’s been a staple at gatherings, potlucks, and even quiet nights at home when I need a little sweet comfort.
Now, let’s dive into this delightful recipe that has made its way into my heart—and you’ll quickly see why it deserves a spot in your recipe collection!
Recipe Timing
- Prep Duration: 20 minutes
- Active Cooking: 15 minutes
- Total Duration: 4 hours 35 minutes
- Portion Size: Serves 8
- Complexity: Simple
Nutritional Recipe
- Calories per portion: Approx. 350
- Protein: 5g
- Carbs: 28g
- Fats: 25g
- Fiber: 1g
- Sugars: 14g
- Sodium: 230mg
Why You’ll Love This No Bake Oreo Cheesecake
This No Bake Oreo Cheesecake is a celebration of simplicity and taste. The creamy filling is surprisingly easy to whip up, and the Oreo crust adds that delightful crunch we all crave alongside a sweet, velvety filling. Whether you’re celebrating a special occasion or simply indulging in a quiet evening, this cheesecake provides that perfect balance of sweetness without the fuss of baking. Plus, the beauty of it being a no-bake dessert means you can prepare it ahead of time and let the fridge do the hard work!
The Complete Cooking Journey
Let’s embark on this delightful journey to make a No Bake Oreo Cheesecake that’ll impress everyone. Ready your utensils, and let’s break down each step!
Ingredients:
- 24 Oreo cookies
- 1/4 cup butter, melted
- 2 cups cream cheese, softened
- 1 cup powdered sugar
- 1 teaspoon vanilla extract
- 1 cup heavy cream
- 8 Oreo cookies, crushed (for topping)
Method:
Step 1: Crush the Oreos for the Crust
Start by crushing 24 Oreo cookies into fine crumbs, combining them with melted butter until they’re evenly coated. Press this mixture firmly into the bottom of a 9-inch springform pan to create a solid crust.
Step 2: Mix the Cream Cheese Filling
In a large mixing bowl, beat together the softened cream cheese, powdered sugar, and vanilla extract until the mixture is smooth and creamy.
Step 3: Whip the Heavy Cream
Take another bowl and whip the heavy cream until stiff peaks form. This step adds that lightness to the overall texture of the cheesecake.
Step 4: Combine the Creamy Mixtures
Gently fold the whipped cream into the cream cheese mixture until everything is fully combined. You want to keep it light and fluffy, so go easy here!
Step 5: Pour the Filling Over the Crust
Carefully pour the luscious cheesecake filling over your pressed Oreo crust. Smooth it out for an even spread.
Step 6: Add the Finishing Touch
Sprinkle the crushed Oreo cookies over the top of the cheesecake for that extra crunch and visual delight.
Step 7: Refrigerate and Set
Now, this is where the magic happens! Refrigerate the cheesecake for at least 4 hours—or even better, overnight—until it’s fully set.
Step 8: Serve and Enjoy
When you’re ready to serve, remove the cheesecake from the springform pan, slice, and indulge in a treat that will leave you craving more.
Serving Suggestions & Pairings
This cheesecake pairs beautifully with fresh fruit, such as strawberries or raspberries, which add a touch of tartness to balance the richness. You can also serve it with a drizzle of chocolate or caramel sauce for an added layer of indulgence. For special occasions, a dollop of whipped cream on top will always make it more festive!
Storage & Leftovers Guide
Store any leftover cheesecake in an airtight container in the refrigerator, where it should last for about 3 to 5 days. Honestly, if you have leftovers, consider yourself lucky—they’re perfect for a late-night snack!
Kitchen Wisdom & Success Tips
- For the best results, make sure your cream cheese is softened to room temperature; this will ensure a smooth filling.
- Keep the whipped cream separate until you’re ready to serve for maximum fluffiness.
- If you prefer a sweeter dessert, feel free to adjust the sugar level according to your taste.
Flavor Variations & Adaptations
- Mint Oreo Cheesecake: Substitute regular Oreos with mint-flavored Oreos for a refreshing twist.
- Peanut Butter Oreo Cheesecake: Fold in some creamy peanut butter into the filling for a delightful flavor combination.
- Chocolate Drizzle: Adding a chocolate drizzle on top before serving enhances both the flavor and presentation.
Reader Questions & Solutions
- Can I use low-fat cream cheese? Yes, but it may change the texture slightly, making it less creamy.
- What do I do if my filling is too soft? Ensure your whipped cream is whipped to stiff peaks, which helps in setting the cheesecake.
- Can I make this in advance? Absolutely! This cheesecake tastes better the longer it sits in the fridge, allowing the flavors to meld.
- What’s the best way to slice the cheesecake? Use a knife dipped in warm water to easily cut through the filling without it sticking.
- Are there gluten-free options available? You can find gluten-free Oreos! Just swap them in for the crust.
Wrapping Up
There you have it: a No Bake Oreo Cheesecake that’s bound to be a showstopper at your next gathering or an indulgent treat for a quiet night in. With its creamy texture and familiar flavors, it’s the perfect way to satisfy your sweet cravings without turning on the oven. So grab your ingredients, gather your loved ones, and create not just a dessert, but a cherished memory. Happy baking (or in this case, mixing)! 🍰✨
Print
No Bake Oreo Cheesecake
- Total Time: 275 minutes
- Yield: 8 servings 1x
- Diet: Vegetarian
Description
A creamy, no-bake cheesecake featuring a crunchy Oreo crust and deliciously rich filling.
Ingredients
- 24 Oreo cookies
- 1/4 cup butter, melted
- 2 cups cream cheese, softened
- 1 cup powdered sugar
- 1 teaspoon vanilla extract
- 1 cup heavy cream
- 8 Oreo cookies, crushed (for topping)
Instructions
- Crush the 24 Oreo cookies into fine crumbs, combining them with melted butter until evenly coated. Press into the bottom of a 9-inch springform pan to create a crust.
- In a large mixing bowl, beat together the softened cream cheese, powdered sugar, and vanilla extract until smooth and creamy.
- Whip the heavy cream in another bowl until stiff peaks form.
- Gently fold the whipped cream into the cream cheese mixture until fully combined.
- Pour the cheesecake filling over the pressed Oreo crust and smooth it out.
- Sprinkle the crushed Oreo cookies over the top.
- Refrigerate for at least 4 hours or overnight until fully set.
- Remove from the springform pan, slice, and enjoy!
Notes
For best results, use softened cream cheese and whip the cream separately until ready to serve for maximum fluffiness.
- Prep Time: 20 minutes
- Cook Time: 15 minutes
- Category: Dessert
- Method: No-Bake
- Cuisine: American
Nutrition
- Serving Size: 1 slice
- Calories: 350
- Sugar: 14g
- Sodium: 230mg
- Fat: 25g
- Saturated Fat: 15g
- Unsaturated Fat: 10g
- Trans Fat: 0g
- Carbohydrates: 28g
- Fiber: 1g
- Protein: 5g
- Cholesterol: 70mg