Strawberry Cheesecake Jars
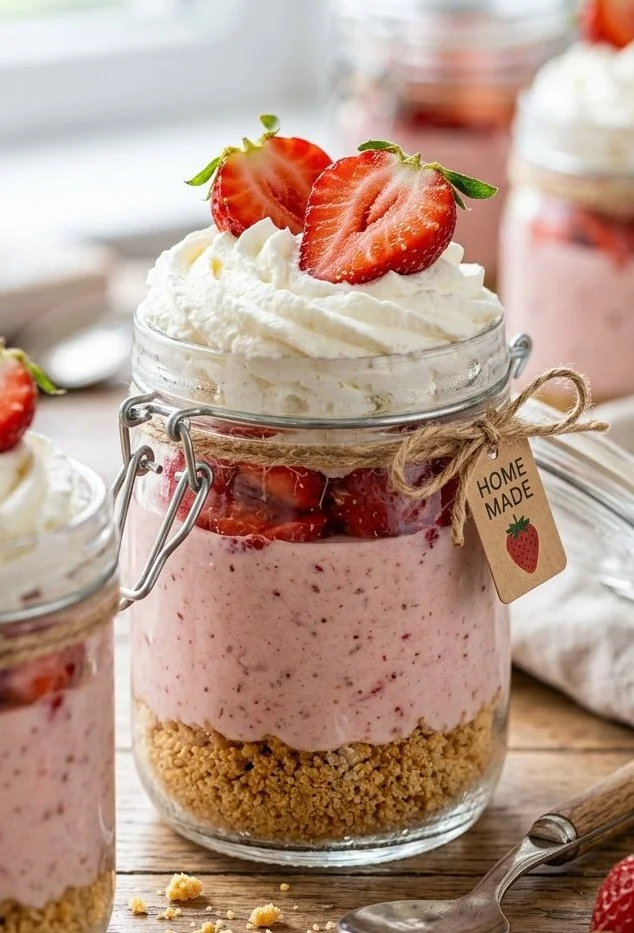
Strawberry Cheesecake Jars are a delightful treat that combines the creamy richness of cheesecake with the sweet, tangy burst of fresh strawberries. Perfect for parties, picnics, or a cozy night in, these individual jars make it easy for everyone to enjoy their dessert in a simple and elegant way. You can whip them up quickly, and they chill beautifully in the fridge until you’re ready to serve. Let’s take a deep dive into making this scrumptious dessert that will leave everyone craving more!
Recipe Information
- Prep Time: 20 minutes
- Cook Time: 0 minutes
- Total Time: 2 hours 20 minutes (includes chilling time)
- Servings: 4
- Difficulty Level: Easy
Nutrition Information
- Calories per serving: 420
- Protein: 6 grams
- Carbohydrates: 33 grams
- Fat: 32 grams
- Fiber: 1 gram
- Sugar: 20 grams
- Sodium: 230 mg
Why Make This Strawberry Cheesecake Jars
These Strawberry Cheesecake Jars are not only visually appealing but also bursting with flavor. The combination of the buttery graham cracker crust, the smooth and creamy cheesecake filling, and the fresh strawberries make for a heavenly bite. The portion-controlled jars are perfect for gatherings and allow you to serve a sophisticated dessert without the fuss of cutting slices. Plus, they can be made ahead of time, freeing you up to enjoy the festivities!
How to Make Strawberry Cheesecake Jars
Creating these delightful jars is straightforward and fun. Follow the simple steps below to get started on your new favorite dessert.
Ingredients:
- 1 cup graham cracker crumbs
- 1/4 cup sugar
- 1/2 cup unsalted butter, melted
- 8 oz cream cheese, softened
- 1/2 cup powdered sugar
- 1 tsp vanilla extract
- 1 cup heavy whipping cream
- 2 cups fresh strawberries, sliced
Directions:
-
Step 1: Preparation
In a bowl, combine graham cracker crumbs, sugar, and melted butter. Mix well until fully combined.
-
Step 2: Forming the Crust
Press the crumb mixture into the bottom of jars, making sure to create an even layer to form a sturdy crust.
-
Step 3: Mixing the Cheesecake Filling
In another bowl, beat the softened cream cheese, powdered sugar, and vanilla extract until the mixture is smooth and creamy.
-
Step 4: Whipping the Cream
In a separate bowl, whip the heavy cream until stiff peaks form. This should take a few minutes with an electric mixer.
-
Step 5: Combining Mixtures
Gently fold the whipped cream into the cream cheese mixture until fully incorporated, being careful not to deflate the whipped cream.
-
Step 6: Layering
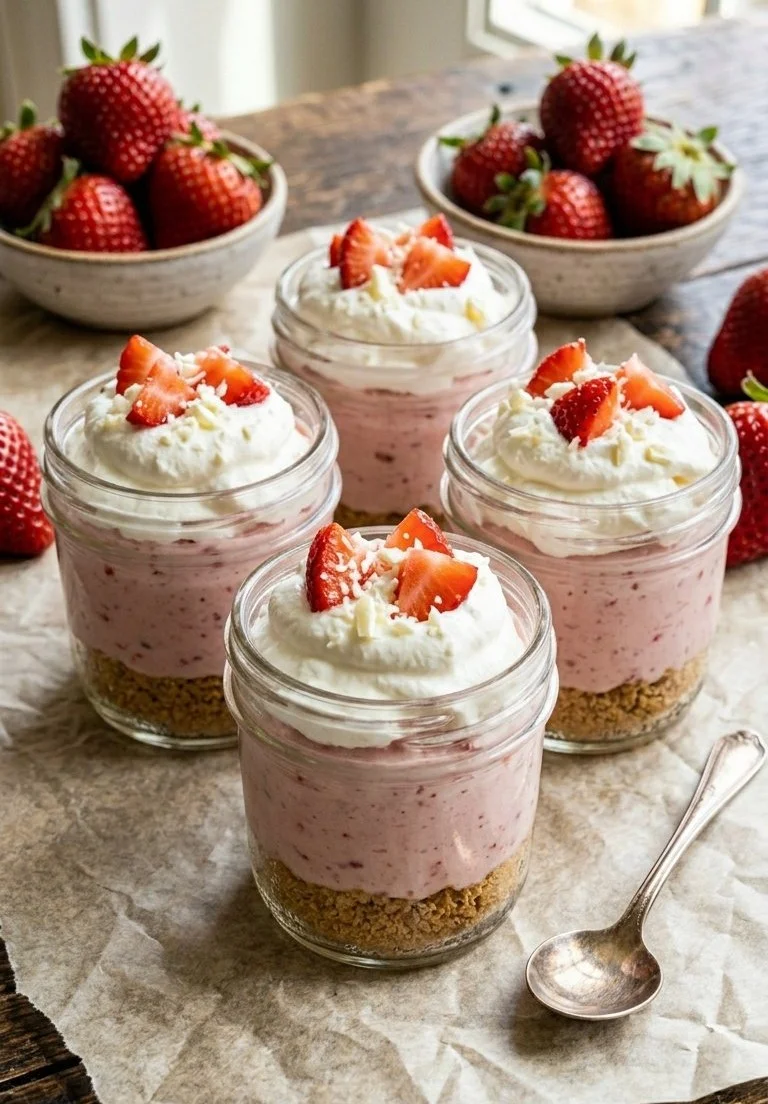
Layer the cheesecake mixture over the crust in the jars, then add a layer of sliced strawberries.
-
Step 7: Repeating Layers
Repeat the layers until the jars are filled to the top. Aim for at least two layers of cheesecake and strawberries for a beautiful presentation.
-
Step 8: Chilling
Chill the jars in the refrigerator for at least 2 hours before serving. This allows the flavors to meld and the cheesecake to firm up.
How to Serve Strawberry Cheesecake Jars
Serve these jars chilled straight from the refrigerator. You can garnish with extra strawberry slices or a dollop of whipped cream on top for a luxurious touch. These jars are perfect for picnics, parties, or as an after-dinner treat—everyone will love having their own individual dessert!
How to Store Strawberry Cheesecake Jars
Store any leftover jars in the refrigerator, covered with plastic wrap or a lid, for up to 3 days. However, these treats taste best when eaten fresh, so make them in smaller batches if you expect to have leftovers.
Expert Tips for Perfect Strawberry Cheesecake Jars
- Use full-fat cream cheese for the creamiest texture.
- Make sure your cream cheese is softened to room temperature for easier mixing.
- If you’re short on time, use store-bought whipped cream instead of whipping your own.
- Replace fresh strawberries with other berries like blueberries or raspberries for a different flavor profile.
Delicious Variations
- Chocolate Strawberry Cheesecake Jars: Mix some melted chocolate into the cream cheese layer for a decadent twist.
- No-Bake Lemon Cheesecake Jars: Substitute lemon juice and zest for some of the sugar for a zesty alternative.
- Peanut Butter Cheesecake Jars: Incorporate peanut butter into the cheesecake mixture for a nutty flavor.
Frequently Asked Questions
-
Can I make this recipe vegan?
Yes, you can substitute the cream cheese with a vegan cream cheese alternative, use a plant-based whipped cream, and replace butter with coconut oil for the crust. -
What can I use instead of graham crackers?
You can use crushed Oreo cookies, digestive biscuits, or even gluten-free crackers for the crust. -
How long can I keep these jars in the fridge?
The jars can be stored in the refrigerator for up to 3 days but are best eaten within 1-2 days for optimal freshness. -
Can I freeze Strawberry Cheesecake Jars?
While you can freeze the layers separately, it’s best enjoyed fresh. Freezing may alter the texture of the cream cheese layer. -
What if I don’t have jars?
You can layer this dessert in any suitable container, such as bowls or cups, making it versatile for whatever you have on hand.
Conclusion
Making Strawberry Cheesecake Jars is a simple yet rewarding experience that can elevate any occasion. With their light, creamy texture and bright strawberry flavor, these jars are sure to impress your friends and family. So, gather your ingredients, dive into this recipe, and enjoy creating this delightful treat. Trust me, once you make them, they’ll become a regular in your dessert rotation!
Print
Strawberry Cheesecake Jars
- Total Time: 140 minutes
- Yield: 4 servings 1x
- Diet: Vegetarian
Description
Delightful jars of creamy cheesecake layered with fresh strawberries, perfect for any occasion.
Ingredients
- 1 cup graham cracker crumbs
- 1/4 cup sugar
- 1/2 cup unsalted butter, melted
- 8 oz cream cheese, softened
- 1/2 cup powdered sugar
- 1 tsp vanilla extract
- 1 cup heavy whipping cream
- 2 cups fresh strawberries, sliced
Instructions
- Combine graham cracker crumbs, sugar, and melted butter in a bowl. Mix well until fully combined.
- Press the crumb mixture into the bottom of jars, creating an even layer for a sturdy crust.
- Beat the softened cream cheese, powdered sugar, and vanilla extract in another bowl until smooth and creamy.
- Whip the heavy cream in a separate bowl until stiff peaks form, using an electric mixer.
- Fold the whipped cream into the cream cheese mixture until fully incorporated, being careful not to deflate the whipped cream.
- Layer the cheesecake mixture over the crust in the jars, then add a layer of sliced strawberries.
- Repeat the layers until jars are filled, aiming for at least two layers for a beautiful presentation.
- Chill the jars in the refrigerator for at least 2 hours before serving to allow flavors to meld and cheesecake to firm up.
Notes
These jars are perfect for parties or picnics and can be made ahead of time. Store in the fridge for up to 3 days.
- Prep Time: 20 minutes
- Cook Time: 0 minutes
- Category: Dessert
- Method: No-Bake
- Cuisine: American
Nutrition
- Serving Size: 1 jar
- Calories: 420
- Sugar: 20g
- Sodium: 230mg
- Fat: 32g
- Saturated Fat: 20g
- Unsaturated Fat: 5g
- Trans Fat: 0g
- Carbohydrates: 33g
- Fiber: 1g
- Protein: 6g
- Cholesterol: 75mg