Pistachio Bird’s Nests
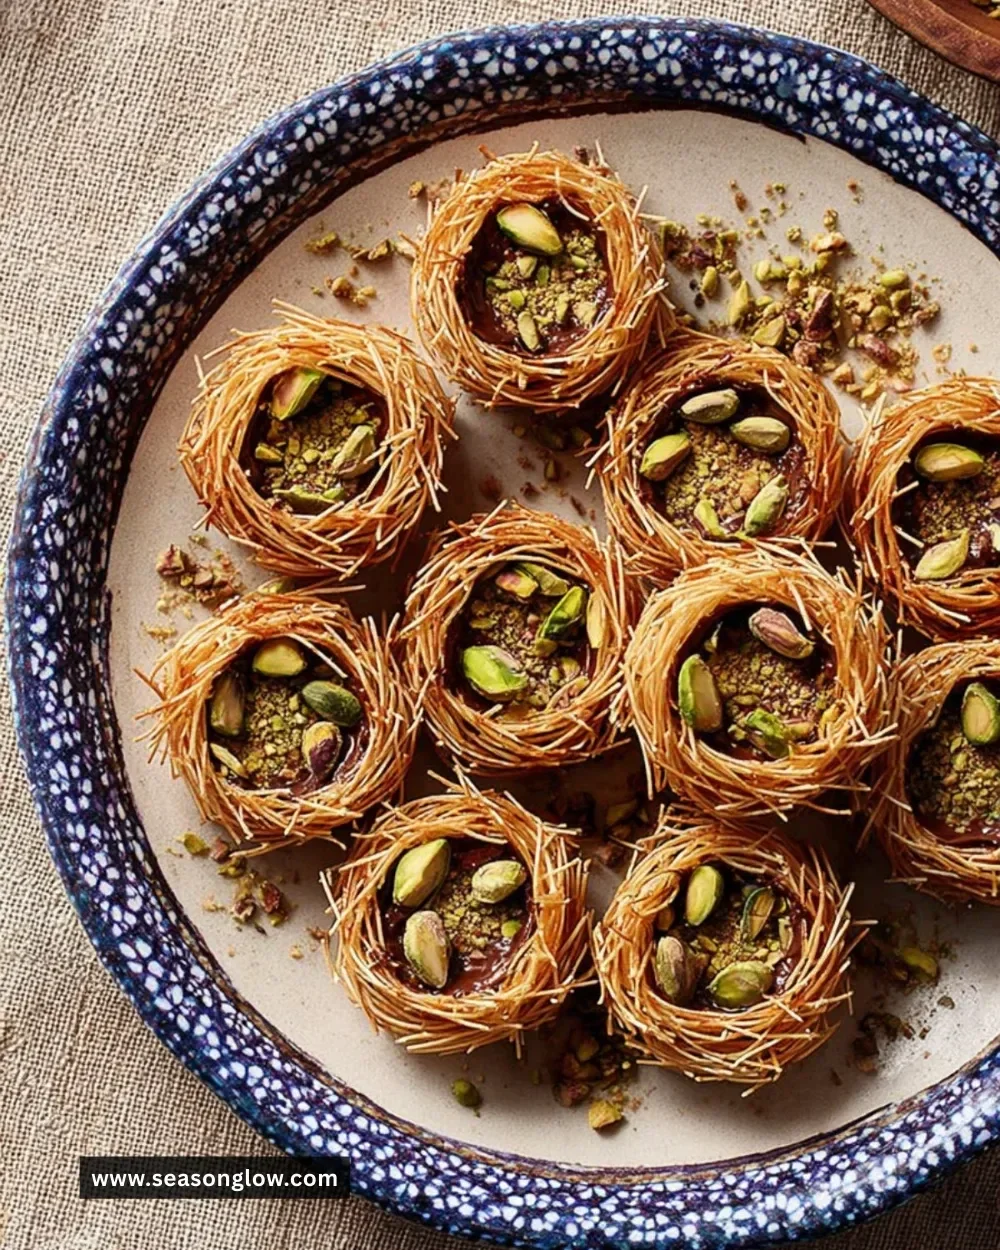
Pistachio Bird’s Nests are a delightful treat that capture the essence of spring and celebrate the joy of sweetness with a fun presentation. Perfect for Easter gatherings, special occasions, or just a cozy afternoon at home, these charming little nests are sure to impress both kids and adults alike. With a beautiful array of colors and a mix of delightful textures, these nests combine the nutty flavor of pistachios, the salty crunch of pretzels, and the sweetness of chocolate and coconut, creating a sensational treat that’s both simple and enjoyable to make.
Recipe Information
- Prep Time: 15 minutes
- Cook Time: 5 minutes
- Total Time: 20 minutes
- Servings: 12 servings
- Difficulty Level: Easy
Nutrition Information
- Calories per serving: 180
- Protein: 4g
- Carbohydrates: 21g
- Fat: 9g
- Fiber: 2g
- Sugar: 8g
- Sodium: 75mg
Why Make This Pistachio Bird’s Nests
Making Pistachio Bird’s Nests is an enjoyable and creative process that allows you to engage with flavors and textures in a hands-on way. Not only do they look gorgeous on a platter, but they also pack a flavorful punch. The combination of crunchy, salty, and sweet elements will tantalize your taste buds, while the vibrant colors make them visually appealing for any celebration. Plus, they are quick to whip up, making it an ideal recipe for all skill levels.
How to Make Pistachio Bird’s Nests
Ingredients:
- 1 cup pistachio nuts, chopped
- 1 cup pretzel sticks
- 1 cup chocolate chips
- 2 cups shredded coconut
- Egg-shaped candies (e.g., jellybeans or chocolate eggs)
Directions:
-
Step 1: Melting the Chocolate
Begin by melting the chocolate chips. You can do this in a microwave in 30-second intervals, stirring each time until fully melted, or use a double boiler for a more controlled melt. Be patient, as burnt chocolate can ruin the flavor!
-
Step 2: Mixing the Ingredients
In a large mixing bowl, combine the melted chocolate with the chopped pistachios and pretzel sticks. Stir until everything is well-coated, and the chocolate evenly distributes over all the ingredients.
-
Step 3: Adding Coconut
Add the shredded coconut to the bowl. Mix thoroughly until the coconut is distributed evenly throughout the chocolate, pistachio, and pretzel mixture.
-
Step 4: Shaping the Nests
On a parchment-lined baking sheet, form small nests using the mixture. Create indentations in the centers to hold your egg candies later. You can shape them with your hands or use a spoon.
-
Step 5: Setting the Nests
Place the baking sheet in the refrigerator for about 30 minutes or until the nests are firm to the touch. This helps the chocolate set properly.
-
Step 6: Filling with Candy
Once the nests have set, carefully add the egg-shaped candies in the indentations of each nest. This is where the fun really begins!
-
Step 7: Serving
You can now serve your Pistachio Bird’s Nests immediately or store them in an airtight container until you’re ready to enjoy them.
How to Serve Pistachio Bird’s Nests
Serve these delightful nests on a platter for parties, picnics, or casual gatherings. They make excellent table centerpieces, and you can accompany them with fresh fruit or other springtime treats. Adding a drizzle of additional melted chocolate over the nests can give them a beautiful finishing touch!
How to Store Pistachio Bird’s Nests
Store your Pistachio Bird’s Nests in an airtight container at room temperature for up to 5 days. If you live in a particularly warm climate, consider refrigerating them to keep the chocolate firm. However, note that refrigeration may change the texture slightly, so enjoy them fresh whenever possible.
Expert Tips for Perfect Pistachio Bird’s Nests
- Use quality chocolate for melting—chocolate chips or chocolate bars will work.
- You can substitute the pistachios with any nuts or seeds you prefer, such as almonds or sunflower seeds, for a different flavor profile.
- Consider mixing in mini chocolate chips, dried fruits, or even some sprinkles to add more color and texture to your nests.
- If you’re serving these to children or at a gathering, adapting the type of candy in the nests can cater to various tastes.
Delicious Variations
- Chocolate Lovers’ Version: Use dark chocolate instead of milk chocolate and mix in some cocoa powder with the coconut for an extra-chocolatey kick.
- Fruit Nests: Incorporate dried fruits like cranberries or raisins for added sweetness and chewiness.
- Nut-Free Option: Replace nuts with an additional cup of more pretzel sticks or a sunflower seed blend for a nut-free version.
Frequently Asked Questions
-
Can I use white chocolate instead of regular chocolate?
Absolutely! White chocolate makes for a delicious alternative and pairs beautifully with the crunchy components of the nests. -
What type of pretzels work best for this recipe?
Thin pretzel sticks are ideal since they mimic twigs and allow for easy assembly. However, you can use broken pretzel pieces for a different texture if desired. -
How far in advance can I make these nests?
You can make them a few days ahead of time. Just store them in a cool, dry place or in the refrigerator to retain their texture. -
Can I freeze these nests?
Yes! You can freeze them for up to a month. Just make sure to store them in an airtight container and let them come back to room temperature before serving. -
How can I make these nests dairy-free?
Simply use dairy-free chocolate chips to ensure the nests are suitable for those with dairy sensitivities.
Conclusion
Pistachio Bird’s Nests are a delightful, easy-to-make treat that captures the whimsy of springtime. With their perfect blend of flavors and textures, they are sure to bring a smile to anyone who enjoys them. Whether you’re preparing them for a festive occasion or just a sweet little surprise for yourself, these nests are a great way to celebrate seasonal fun in the kitchen. So grab your ingredients and start creating today—you’ll love the process as much as the delicious results!