Mini Egg Easter Cheesecake
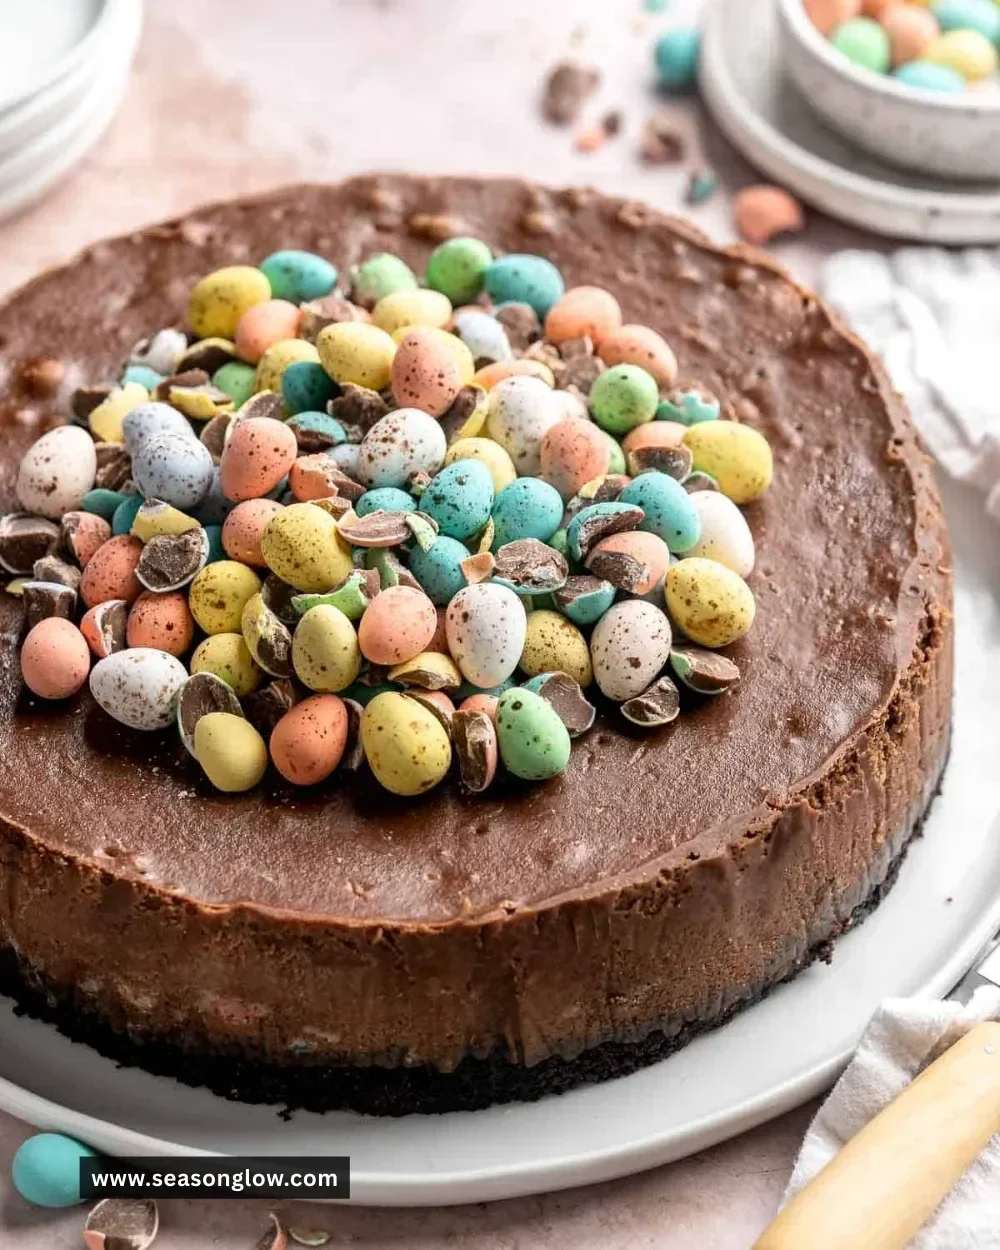
The Mini Egg Easter Cheesecake is a delightful treat that will make your Easter celebrations even sweeter. With its creamy texture and a crunchy biscuit base, it’s a dish that appeals to both kids and adults alike. The addition of mini chocolate eggs adds a festive touch, making this cheesecake perfect for sharing with family and friends. Whether served as dessert at a holiday gathering or a sweet snack, this cheesecake is sure to bring joy to the table!
Recipe Information
- Prep Time: 20 minutes
- Cook Time: 25 minutes
- Total Time: 4 hours 45 minutes (includes chilling time)
- Servings: 12 mini cheesecakes
- Difficulty Level: Easy
Nutrition Information
- Calories per serving: 250
- Protein: 4g
- Carbohydrates: 22g
- Fat: 18g
- Fiber: 0g
- Sugar: 10g
- Sodium: 150mg
Why Make This Mini Egg Easter Cheesecake
This Mini Egg Easter Cheesecake is not just delicious; it’s visually stunning too. The bright colors and glossy mini eggs on top create an inviting presentation that looks great on any dessert table. Perfect for Easter, its creamy flavor combined with the crunchy biscuit base gives every bite a satisfying texture. Additionally, it’s straightforward enough for both beginner and experienced bakers to whip up. Who doesn’t love a dessert that’s both cute and tasty?
How to Make Mini Egg Easter Cheesecake
Ingredients:
- 200g digestive biscuits
- 100g butter, melted
- 400g cream cheese
- 100g sugar
- 200ml heavy cream
- 3 eggs
- 1 teaspoon vanilla extract
- 200g mini chocolate eggs (e.g., Cadbury Mini Eggs)
Directions:
-
Step 1: Preparation
Preheat the oven to 160°C (320°F).
-
Step 2: Mixing the Crust
Crush the digestive biscuits finely and mix them with the melted butter to create a soft, crumbly mixture. Press this mixture firmly into the bottom of mini cheesecake pans to form a solid crust.
-
Step 3: Mixing the Filling
In a large bowl, beat the cream cheese with sugar until the mixture is smooth and creamy. It should be free from lumps.
-
Step 4: Incorporating Eggs
Add the eggs one by one to the cream cheese mixture, ensuring to mix well after each addition. Then, stir in the vanilla extract to enhance the flavor.
-
Step 5: Folding in Cream
Gently fold in the heavy cream for added richness and half of the mini chocolate eggs into your cheesecake mixture, ensuring everything is combined without overmixing.
-
Step 6: Baking
Pour your cheesecake mixture over the prepared biscuit crusts in the mini pans. Bake in the preheated oven for about 20-25 minutes or until the cheesecakes are set but still slightly jiggly in the center.
-
Step 7: Cooling and Setting
Allow the cheesecakes to cool completely at room temperature. Once cooled, refrigerate for at least 4 hours to ensure they set perfectly.
-
Step 8: Garnishing
Before serving, garnish each mini cheesecake with the remaining mini chocolate eggs. This adds a decorative touch and extra chocolatey goodness!
How to Serve Mini Egg Easter Cheesecake
Serve your Mini Egg Easter Cheesecake chilled for the best texture. You can plate them individually or place them on a beautiful serving platter for a visually appealing dessert station. Pair with a dollop of whipped cream or a drizzle of chocolate sauce for an extra indulgent treat.
How to Store Mini Egg Easter Cheesecake
These cheesecakes can be kept in the refrigerator in an airtight container for up to 3 days. If you want to enjoy them later, you can also freeze them without the chocolate eggs for up to a month. Just ensure to wrap them well to prevent freezer burn.
Expert Tips for Perfect Mini Egg Easter Cheesecake
- Ensure Ingredients are Room Temperature: Let your cream cheese and eggs sit out for about 30 minutes before using them. This helps to create a smoother batter.
- Don’t Overmix: When folding in the heavy cream and mini eggs, be gentle to keep the mixture light and airy.
- Bake Until Just Set: Stay close to the oven as they bake; pulling them out while still slightly jiggly helps prevent cracks as they cool.
- Let Them Chill: The longer they chill, the better they’ll taste! Overnight chilling is best for enhanced flavor.
- Decorate Creatively: Use edible glitter or fresh berries along with the mini eggs for a fun twist.
Delicious Variations
- Fruit-Topped Cheesecake: Instead of mini eggs, top each cheesecake with seasonal fruits like berries or sliced kiwi for a fresh twist.
- Chocolate Swirl: Mix in some melted chocolate to the cream cheese batter before baking for a richer chocolate flavor.
- Lemon Zest: Add lemon zest to the mixture for a refreshing citrus flair that balances the sweetness.
Frequently Asked Questions
-
Can I use a different type of biscuit?
Yes! You can substitute digestive biscuits with graham crackers or any cookies you prefer for the crust. -
Can I make these cheesecakes in a larger size?
Absolutely! You can make a full-sized cheesecake using a springform pan. Just increase the baking time to 40-50 minutes. -
What if I don’t like chocolate eggs?
You can swap mini chocolate eggs for mini marshmallows or crushed candies for a colorful and fun topping. -
Is it possible to make this cheesecake without eggs?
You can use egg substitutes or try a silken tofu alternative that works well to bind the ingredients. -
How do I prevent cracks in my cheesecake?
Avoid overmixing and bake at a consistent temperature. A water bath can also help maintain even baking if using larger pans.
Conclusion
The Mini Egg Easter Cheesecake is a delightful dessert that captures the spirit of Easter in every bite. Its creamy texture, combined with crunchy biscuit crust and adorable mini eggs, makes it a festive choice for gatherings. Don’t hesitate to try this recipe; it’s an easy and enjoyable way to impress your guests and create joyous memories. Happy baking!