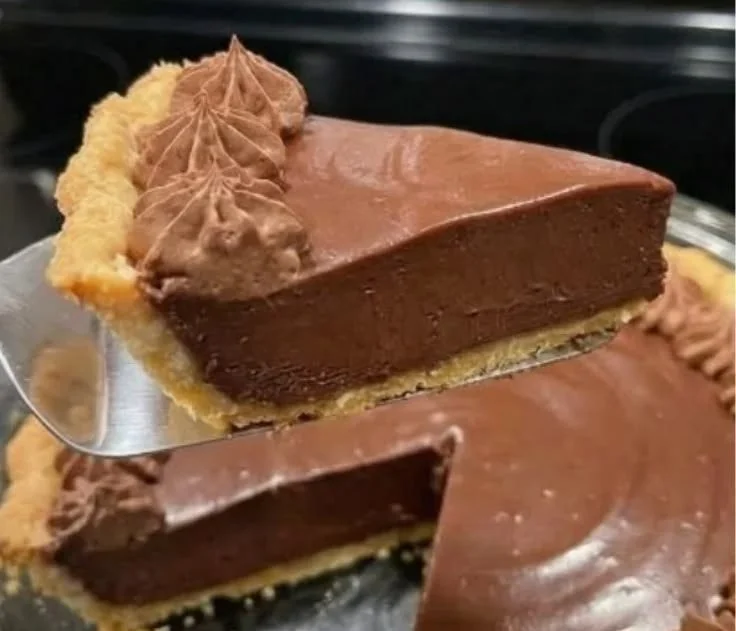
Grandma’s Chocolate Pie
Recipe Information
- Prep Time: 15 minutes
- Cook Time: 15 minutes
- Total Time: 30 minutes
- Servings: 8
- Difficulty Level: Easy
Nutrition Information
- Calories per serving: Approximately 250
- Protein: 4g
- Carbohydrates: 35g
- Fat: 12g
- Fiber: 1g
- Sugar: 21g
- Sodium: 90mg
Why Make This Grandma’s Chocolate Pie
There’s something truly nostalgic about Grandma’s Chocolate Pie. This beloved recipe often evokes warm memories of family gatherings and sweet treats shared after dinner. Rich, creamy, and oh-so-chocolatey, this pie is perfect for any occasion—from holiday celebrations to casual weeknight desserts. It’s simple to make and packs a delightful punch, making it an excellent choice for anyone craving something indulgent. Plus, the combination of a smooth chocolate filling with a flaky crust is a dream come true for any chocolate lover.
How to Make Grandma’s Chocolate Pie
Ingredients:
- 1 pre-made pie crust
- 1 cup granulated sugar
- 1/3 cup unsweetened cocoa powder
- 1/4 cup cornstarch
- 1/4 teaspoon salt
- 2 3/4 cups milk
- 3 egg yolks, beaten
- 2 tablespoons butter
- 1 teaspoon vanilla extract
- Whipped cream for topping
Directions:
### Step 1: Preparation
Preheat your oven to 350°F (175°C). Take your pre-made pie crust and place it in a pie dish, then bake according to the package instructions until it achieves a beautiful golden color.
### Step 2: Mixing
In a medium saucepan, combine the granulated sugar, cocoa powder, cornstarch, and salt. Gradually whisk in the milk until everything is smooth and combined, eliminating any lumps.
### Step 3: Cooking
Cook the mixture over medium heat, stirring constantly. You want to keep an eye on it until it thickens and starts to bubble gently. This will take about 5-7 minutes, so keep stirring to avoid burning!
### Step 4: Finishing
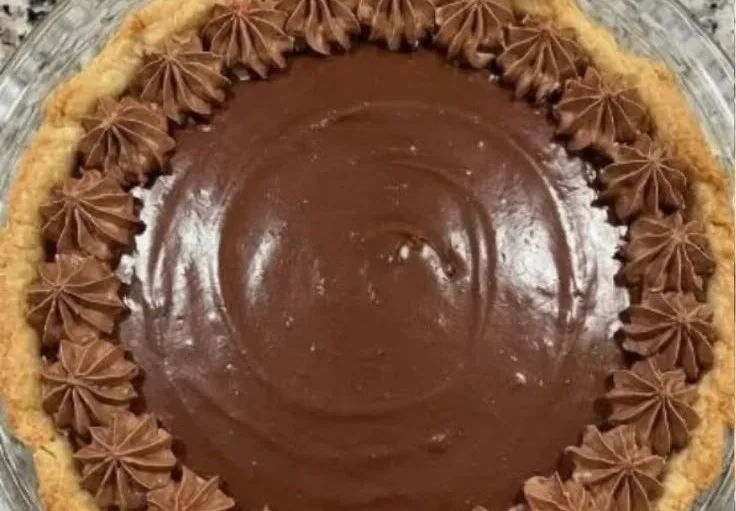
Once thickened, reduce the heat and whisk in the beaten egg yolks. Continue to cook for an additional 2 minutes for the yolks to fully integrate into the mixture. Remove from heat and add in the butter and vanilla extract, stirring until well-blended. Pour this luscious chocolate filling into the baked pie crust and smooth the top. Allow your pie to cool at room temperature for a while, then refrigerate until set, which should take at least 2 hours. Serve it chilled with a generous dollop of whipped cream on top!
How to Serve Grandma’s Chocolate Pie
Serve slices of Grandma’s Chocolate Pie chilled, with a fluffy topping of whipped cream. It makes an excellent dessert for various occasions, from holiday dinners to birthday celebrations. Pair it with a scoop of vanilla ice cream for an even more decadent treat!
How to Store Grandma’s Chocolate Pie
To store your delicious pie, cover it with plastic wrap or aluminum foil and keep it in the refrigerator. It will stay fresh for about 3-4 days. If you want to enjoy it later, consider freezing the pie without the whipped cream; it can last up to two months in the freezer. Thaw overnight in the refrigerator before serving.
Expert Tips for Perfect Grandma’s Chocolate Pie
- Use full-fat milk for a creamier texture and richer flavor.
- If you prefer a gluten-free option, use a gluten-free pie crust or make a crustless version by baking the chocolate filling in a greased dish.
- Taste the filling before pouring into the crust; add more sugar or cocoa if desired.
- Stir constantly during the cooking process to prevent sticking or burning.
- Allow enough time for the pie to chill in the fridge—this setting step is crucial for the best texture!
Delicious Variations
- Peanut Butter Chocolate Pie: Swirl in some peanut butter into the chocolate mixture before pouring it into the crust for an irresistible combination.
- Mint Chocolate Pie: Add a few drops of peppermint extract to the filling for a refreshing minty twist.
- Vegan Chocolate Pie: Substitute the milk with almond or oat milk and use flax eggs instead of regular eggs for a plant-based version.
Frequently Asked Questions
1. Can I use homemade pie crust?
Absolutely! A homemade pie crust adds an extra special touch to the chocolate pie. Just ensure it’s pre-baked before filling it.
2. How can I tell if the filling is thick enough?
The filling should coat the back of a spoon and hold its shape slightly when drizzled. Once it begins to bubble, you know you’re close!
3. Can I use dark chocolate instead of cocoa powder?
Yes, you can melt dark chocolate and incorporate it in place of cocoa powder for a richer chocolate flavor. Adjust sugar to taste.
4. What should I do if the filling doesn’t set?
If the filling doesn’t set, it might need additional cooking. Return it to the stove over low heat and whisk it until it thickens more.
5. Is it necessary to refrigerate the pie?
Yes, chilling is essential. It allows the filling to fully set up and enhances the flavors.
Conclusion
Grandma’s Chocolate Pie is more than just a dessert; it’s a slice of nostalgia that brings comfort to any table. With its delightful, smooth texture and rich cocoa flavor, it’s sure to be a hit with family and friends. We hope you will enjoy making, sharing, and savoring this beloved recipe. Don’t hesitate to try it out and make new memories around the dinner table! Happy baking!
Print
Grandma’s Chocolate Pie
- Total Time: 30 minutes
- Yield: 8 servings 1x
- Diet: Vegetarian
Description
A rich and creamy chocolate pie that’s perfect for any occasion, evoking warm memories of family gatherings.
Ingredients
- 1 pre-made pie crust
- 1 cup granulated sugar
- 1/3 cup unsweetened cocoa powder
- 1/4 cup cornstarch
- 1/4 teaspoon salt
- 2 3/4 cups milk
- 3 egg yolks, beaten
- 2 tablespoons butter
- 1 teaspoon vanilla extract
- Whipped cream for topping
Instructions
- Preheat your oven to 350°F (175°C). Take your pre-made pie crust and place it in a pie dish, then bake according to the package instructions until it achieves a beautiful golden color.
- In a medium saucepan, combine the granulated sugar, cocoa powder, cornstarch, and salt. Gradually whisk in the milk until everything is smooth and combined, eliminating any lumps.
- Cook the mixture over medium heat, stirring constantly until it thickens and starts to bubble gently, about 5-7 minutes.
- Once thickened, reduce the heat and whisk in the beaten egg yolks. Continue to cook for an additional 2 minutes, then remove from heat and add in the butter and vanilla extract, stirring until well-blended. Pour the chocolate filling into the baked pie crust and smooth the top. Allow the pie to cool at room temperature, then refrigerate until set for at least 2 hours. Serve chilled with whipped cream on top!
Notes
Use full-fat milk for a creamier texture. This pie can be frozen without whipped cream for up to two months.
- Prep Time: 15 minutes
- Cook Time: 15 minutes
- Category: Dessert
- Method: Baking
- Cuisine: American
Nutrition
- Serving Size: 1 slice
- Calories: 250
- Sugar: 21g
- Sodium: 90mg
- Fat: 12g
- Saturated Fat: 7g
- Unsaturated Fat: 5g
- Trans Fat: 0g
- Carbohydrates: 35g
- Fiber: 1g
- Protein: 4g
- Cholesterol: 80mg