Easter Egg Cheesecake Jars
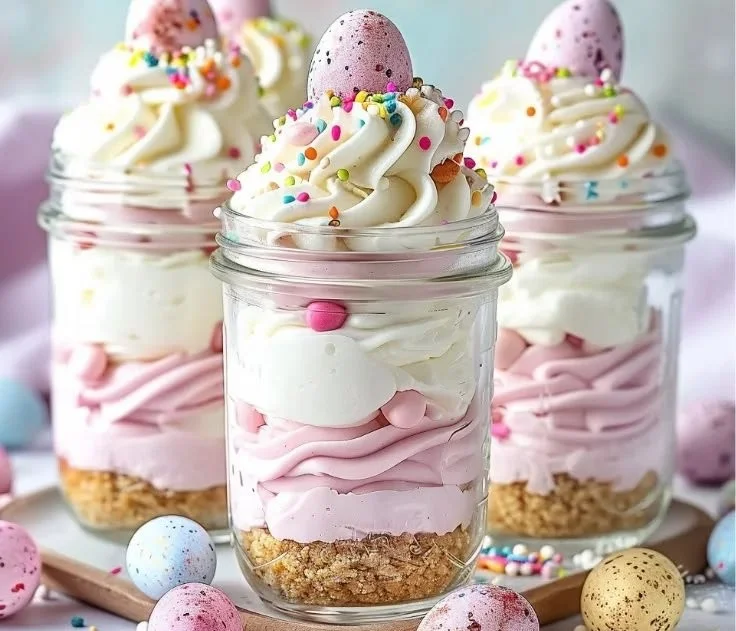
Easter is a time for celebration, and what better way to mark the occasion than with a delightful dessert? Easter Egg Cheesecake Jars are a fun, creative treat that combines the rich, creamy texture of cheesecake with the playful colors of spring. These individual jars are perfect for bringing a smile to your table and can be easily customized to fit your style. Let’s dive into this charming recipe that’s sure to be a hit for families and gatherings alike!
Recipe Information
- Prep Time: 20 minutes
- Cook Time: 0 minutes
- Total Time: 2 hours 20 minutes (includes chilling)
- Servings: 4 servings
- Difficulty Level: Easy
Nutrition Information
- Calories per serving: 350
- Protein: 5 grams
- Carbohydrates: 40 grams
- Fat: 20 grams
- Fiber: 1 gram
- Sugar: 25 grams
- Sodium: 180 mg
Why Make This Easter Egg Cheesecake Jars
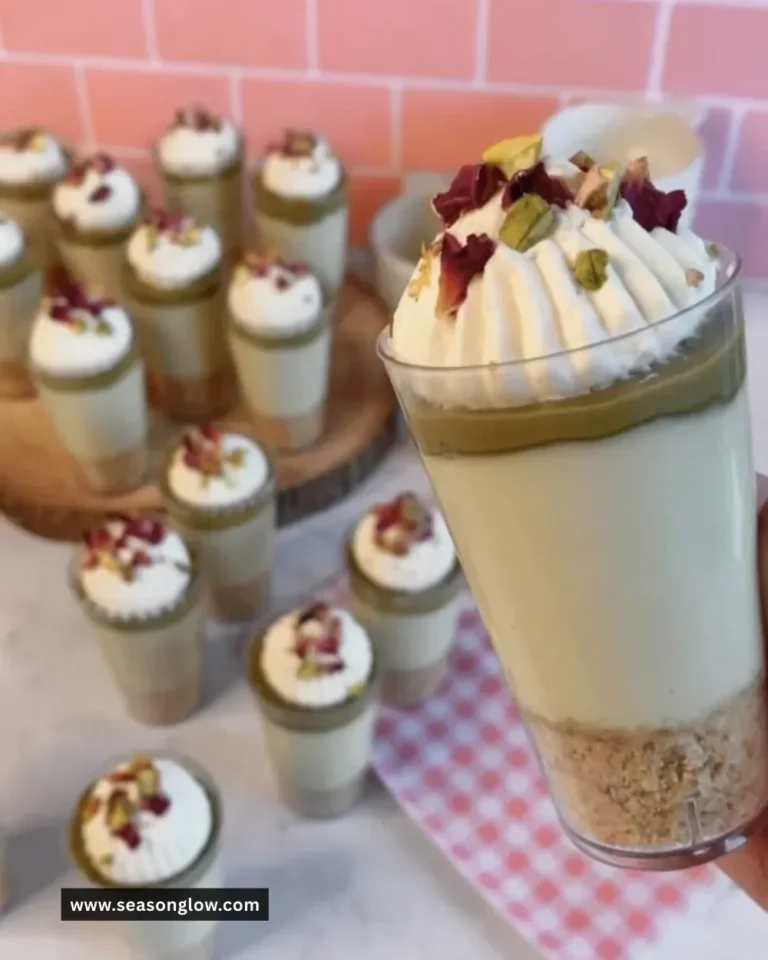
These Easter Egg Cheesecake Jars are not just visually appealing; they are also a breeze to make! The smooth and creamy cheesecake filling is balanced perfectly by the crunch of the graham cracker crust. Furthermore, these jars make serving and sharing easy, as each guest can have their own portion. Plus, they are an excellent opportunity to get creative with colors and toppings, making them an ideal dessert for any Easter celebration.
How to Make Easter Egg Cheesecake Jars
## Ingredients:
- 1 cup graham cracker crumbs
- 1/4 cup unsalted butter, melted
- 8 oz cream cheese, softened
- 1/2 cup powdered sugar
- 1 tsp vanilla extract
- 1 cup whipped cream
- Easter egg candies for decoration
- Food coloring (optional) for layers
## Directions:
-
Step 1: Preparation
In a bowl, mix the graham cracker crumbs and melted butter until combined. Divide the mixture into small jars, pressing it down to create the base.
-
Step 2: Mixing
In another bowl, beat the softened cream cheese with powdered sugar and vanilla extract until smooth.
-
Step 3: Folding
Gently fold in the whipped cream until fully incorporated.
-
Step 4: Coloring
If using food coloring, divide the cheesecake mixture into bowls and tint with food coloring to create layers.
-
Step 5: Layering
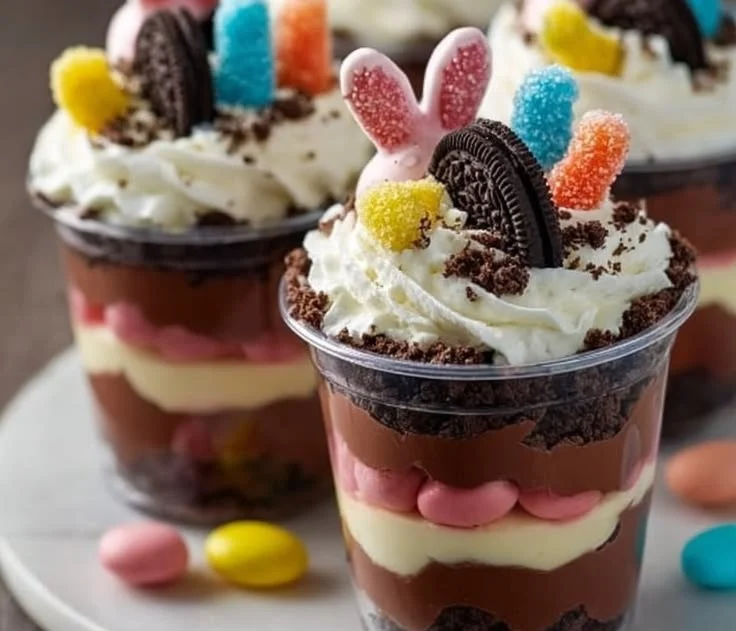
Layer the cheesecake mixture in the jars over the graham cracker base, alternating colors if desired.
-
Step 6: Decorating
Top with Easter egg candies for decoration.
-
Step 7: Chilling
Chill in the refrigerator for at least 2 hours before serving. Enjoy your delightful Easter dessert!
How to Serve Easter Egg Cheesecake Jars
Serve these cheesecake jars cold right from the fridge to keep their delightful texture. They are perfect as individual desserts at Easter brunch, family gatherings, or spring picnics. For an extra touch, you can sprinkle some crushed graham crackers on top or add some additional candy for an inviting presentation.
How to Store Easter Egg Cheesecake Jars
Keep the Easter Egg Cheesecake Jars covered in the refrigerator for up to three days. If you’re preparing them in advance, it’s best to layer the jars and add the candies just before serving to maintain their crunch.
Expert Tips for Perfect Easter Egg Cheesecake Jars
- Use room temperature cream cheese for a smoother filling. Cold cream cheese can result in a lumpy mixture.
- Consider using different flavors of whipped cream or cream cheese for unique variations, such as chocolate or strawberry.
- Experiment with your favorite candies for toppings or even add crushed fruit for a refreshing twist.
Delicious Variations
- Fruit Layers: Instead of using food coloring, layer in some fruit purees, such as raspberry or mango, for a vibrant flavor and color.
- Chocolate Lovers: Substitute some of the cream cheese with chocolate cream cheese for a rich, chocolatey dessert.
- Nutty Crunch: Add finely chopped nuts to the crust for added texture and flavor.
Frequently Asked Questions
-
Can I make these jars in advance?
Yes! You can prepare the bases and the cheesecake filling separately before assembling the jars. Just keep them refrigerated until you’re ready to serve. -
What can I use instead of graham crackers?
You can use crushed digestive biscuits, Oreo cookies, or even gluten-free crackers for the base. -
Is it okay to use store-bought whipped cream?
Absolutely! Store-bought whipped cream can save time and still provide great results. -
How can I make this recipe dairy-free?
Substitute cream cheese with dairy-free cream cheese and use coconut whipped cream for the topping. -
Can I freeze these jars?
It’s not recommended to freeze the cheesecake jars as the texture may change once defrosted. They are best enjoyed fresh!
Conclusion
These Easter Egg Cheesecake Jars bring joy and sweetness to your celebration. They are not only visually stunning but also incredibly easy to make. Whether you stick to the traditional flavors or experiment with new variations, these jars are a delightful treat that everyone will enjoy. So, gather your ingredients, get creative, and make this delightful dessert for your Easter festivities!
Print
Easter Egg Cheesecake Jars
- Total Time: 140 minutes
- Yield: 4 servings 1x
- Diet: Vegetarian
Description
Delightful dessert jars combining creamy cheesecake with vibrant colors, perfect for Easter celebrations.
Ingredients
- 1 cup graham cracker crumbs
- 1/4 cup unsalted butter, melted
- 8 oz cream cheese, softened
- 1/2 cup powdered sugar
- 1 tsp vanilla extract
- 1 cup whipped cream
- Easter egg candies for decoration
- Food coloring (optional) for layers
Instructions
- In a bowl, mix the graham cracker crumbs and melted butter until combined. Divide the mixture into small jars, pressing it down to create the base.
- In another bowl, beat the softened cream cheese with powdered sugar and vanilla extract until smooth.
- Gently fold in the whipped cream until fully incorporated.
- If using food coloring, divide the cheesecake mixture into bowls and tint with food coloring to create layers.
- Layer the cheesecake mixture in the jars over the graham cracker base, alternating colors if desired.
- Top with Easter egg candies for decoration.
- Chill in the refrigerator for at least 120 minutes before serving. Enjoy your delightful Easter dessert!
Notes
Use room temperature cream cheese for a smoother filling. Keep the jars covered in the refrigerator for up to three days.
- Prep Time: 20 minutes
- Cook Time: 0 minutes
- Category: Dessert
- Method: Refrigerating
- Cuisine: American
Nutrition
- Serving Size: 1 jar
- Calories: 350
- Sugar: 25g
- Sodium: 180mg
- Fat: 20g
- Saturated Fat: 11g
- Unsaturated Fat: 9g
- Trans Fat: 0g
- Carbohydrates: 40g
- Fiber: 1g
- Protein: 5g
- Cholesterol: 30mg