Buttermilk Fried Chicken
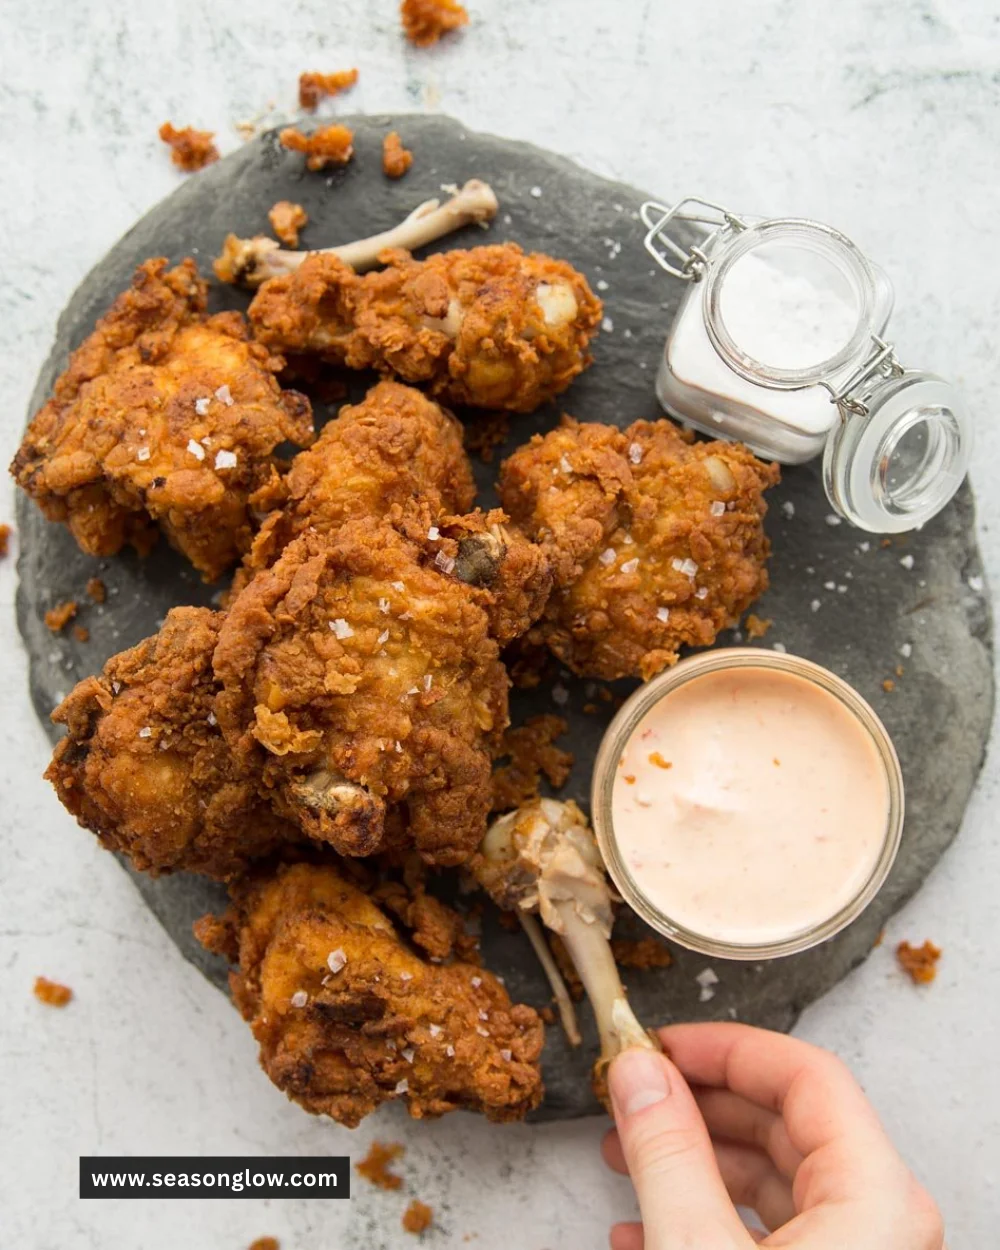
There’s something magical about the sound of sizzling chicken in hot oil, echoing warmth and comfort that fills the kitchen. Growing up, my grandmother had a simple yet profound philosophy: the best memories are made around the table, especially when crispy fried chicken is the star of the show. I remember watching her meticulously prepare her famous—buttermilk fried chicken, the busy rhythm of the kitchen making it feel like a sacred ritual. As she marinated the chicken in creamy buttermilk, she smiled and shared stories of family gatherings filled with laughter and love. There’s a charm in the way that fried chicken becomes not just a meal but a memory. So, let’s bring that nostalgia into our kitchens with this delightful recipe that will have everybody coming back for seconds!
Recipe Timing
- Prep Duration: 2 hours (minimum marination) or overnight
- Active Cooking: 30 minutes
- Total Duration: 2 hours 30 minutes (minimum)
- Portion Size: Serves 4
- Complexity: Simple
Nutritional Recipe
- Calories per portion: Approximately 450
- Protein: 25 grams
- Carbs: 35 grams
- Fats: 25 grams
- Fiber: 2 grams
- Sugars: 1 gram
- Sodium: 600 mg
Why You’ll Love This Buttermilk Fried Chicken
Imagine a perfectly golden-brown chicken, with a crust that crackles as you take your first bite, giving way to tender, juicy meat. The buttermilk not only infuses the chicken with flavor but also tenderizes it, guaranteeing each piece is moist and delightful. The blend of seasonings—salty, peppery, with a hint of garlic and onion—creates a symphony of taste that dances on your palate. This recipe is straightforward enough for beginners but leaves room for seasoned cooks to add their own flair. Whether you’re serving it at a Sunday family dinner or a cozy gathering with friends, this buttermilk fried chicken is guaranteed to be the star attraction.
The Complete Cooking Journey
- Start with Marination: The first step to juicy chicken starts with buttermilk. Let it sit and soak up all that deliciousness.
- Create the Seasoned Flour: This secret blend is what makes your chicken extra crispy and flavorful.
- Heat it Up: The power of hot oil is essential for a perfect fry.
- Dredge and Fry: Coating your chicken in that seasoned flour before frying is where the magic truly begins.
- The Grand Finale: Let your chicken drain and rest, while the anticipation builds!
Ingredients:
- 4 pieces of chicken (legs or thighs)
- 1 cup buttermilk
- 1 cup all-purpose flour
- 1 teaspoon salt
- 1/2 teaspoon black pepper
- 1/2 teaspoon paprika
- 1/4 teaspoon garlic powder
- 1/4 teaspoon onion powder
- Vegetable oil (for frying)
Method:
Step 1: Marinate the Chicken
Marinate the chicken in buttermilk for at least 2 hours or overnight in the refrigerator. This step is crucial, allowing the chicken to soak up moisture and flavor.
Step 2: Prepare the Seasoned Flour
In a bowl, mix together flour, salt, pepper, paprika, garlic powder, and onion powder. This combination will give your chicken a beautifully seasoned crust.
Step 3: Heat the Oil
Heat vegetable oil in a deep skillet over medium-high heat. You want it hot enough so that the chicken sizzles right when it hits the oil—about 350°F.
Step 4: Dredge the Chicken
Remove chicken from the buttermilk, allowing excess to drip off. Dredge in the flour mixture, ensuring every bit is covered for that perfect crunch.
Step 5: Fry the Chicken
Fry chicken in the hot oil for 12-15 minutes on each side, or until golden brown and cooked through. You might need to fry in batches, so as not to overcrowd the pan.
Step 6: Drain and Serve
Once cooked, remove chicken and let it drain on paper towels before serving. This keeps it crispy and not soggy.
Serving Suggestions & Pairings
Serve your buttermilk fried chicken with classic sides like mashed potatoes, coleslaw, or cornbread. A drizzle of honey over the top or a side of homemade barbecue sauce can also elevate the flavors. For drinks, consider sweet tea or a refreshing lemonade to complement the meal perfectly.
Storage & Leftovers Guide
Leftover fried chicken can be stored in an airtight container in the refrigerator for up to 3 days. To reheat while preserving the crispiness, place in the oven at 375°F for about 10-15 minutes. You can also freeze the chicken before frying; it will keep well for up to 3 months.
Kitchen Wisdom & Success Tips
- For an extra crispy crust, double dredge the chicken by dipping back into the buttermilk and then the flour again.
- Let your oil maintain the right temperature; too hot, and the chicken will burn; too cool, and it’ll absorb too much oil.
- Experiment with spices—add cayenne pepper for heat or some dried herbs for a unique flavor twist.
Flavor Variations & Adaptations
Try adding your favorite spices to the flour mix—maybe some dried thyme or rosemary for a herby touch. You could even switch the buttermilk for a flavored yogurt for a tangy twist or try a gluten-free flour for a gluten-free option.
Reader Questions & Solutions
- What if I don’t have buttermilk? You can make a substitute by mixing 1 cup of milk with 1 tablespoon of lemon juice or vinegar. Let it sit for 5-10 minutes to curdle.
- How can I know when the chicken is done? Use a meat thermometer; the internal temperature should reach 165°F to ensure it’s fully cooked.
- What oil should I use for frying? Vegetable oil works well, but canola or peanut oil are also great options due to their high smoke point.
- Can I bake this chicken instead? Yes! Bake at 375°F for about 45 minutes, flipping halfway through.
- Why is my chicken not crispy? Ensure that your oil is hot enough and make sure to drain properly on paper towels to remove excess oil.
Wrapping Up
This buttermilk fried chicken recipe is more than just a meal; it’s a celebration of flavor, nostalgia, and love. As you embark on this cooking adventure, remember the joy it brings—not just in eating, but in the process of creating and sharing something special. So gather your loved ones, pour some sweet tea, and dive into a plate of crispy, juicy goodness. Happy cooking!
Print
Buttermilk Fried Chicken
- Total Time: 150 minutes
- Yield: 4 servings 1x
- Diet: N/A
Description
Delicious buttermilk fried chicken with a crispy crust and juicy meat, perfect for family gatherings.
Ingredients
- 4 pieces of chicken (legs or thighs)
- 1 cup buttermilk
- 1 cup all-purpose flour
- 1 teaspoon salt
- 1/2 teaspoon black pepper
- 1/2 teaspoon paprika
- 1/4 teaspoon garlic powder
- 1/4 teaspoon onion powder
- Vegetable oil (for frying)
Instructions
- Marinate the chicken in buttermilk for at least 2 hours or overnight in the refrigerator.
- In a bowl, mix together flour, salt, pepper, paprika, garlic powder, and onion powder.
- Heat vegetable oil in a deep skillet over medium-high heat (about 350°F).
- Remove chicken from the buttermilk, allowing excess to drip off, then dredge in the flour mixture.
- Fry chicken in the hot oil for 12-15 minutes on each side, or until golden brown and cooked through.
- Remove chicken and let it drain on paper towels before serving.
Notes
For extra crispiness, double dredge the chicken and maintain proper oil temperature during frying.
- Prep Time: 120 minutes
- Cook Time: 30 minutes
- Category: Main Course
- Method: Frying
- Cuisine: American
Nutrition
- Serving Size: 1 piece
- Calories: 450
- Sugar: 1g
- Sodium: 600mg
- Fat: 25g
- Saturated Fat: 4g
- Unsaturated Fat: 18g
- Trans Fat: 0g
- Carbohydrates: 35g
- Fiber: 2g
- Protein: 25g
- Cholesterol: 90mg